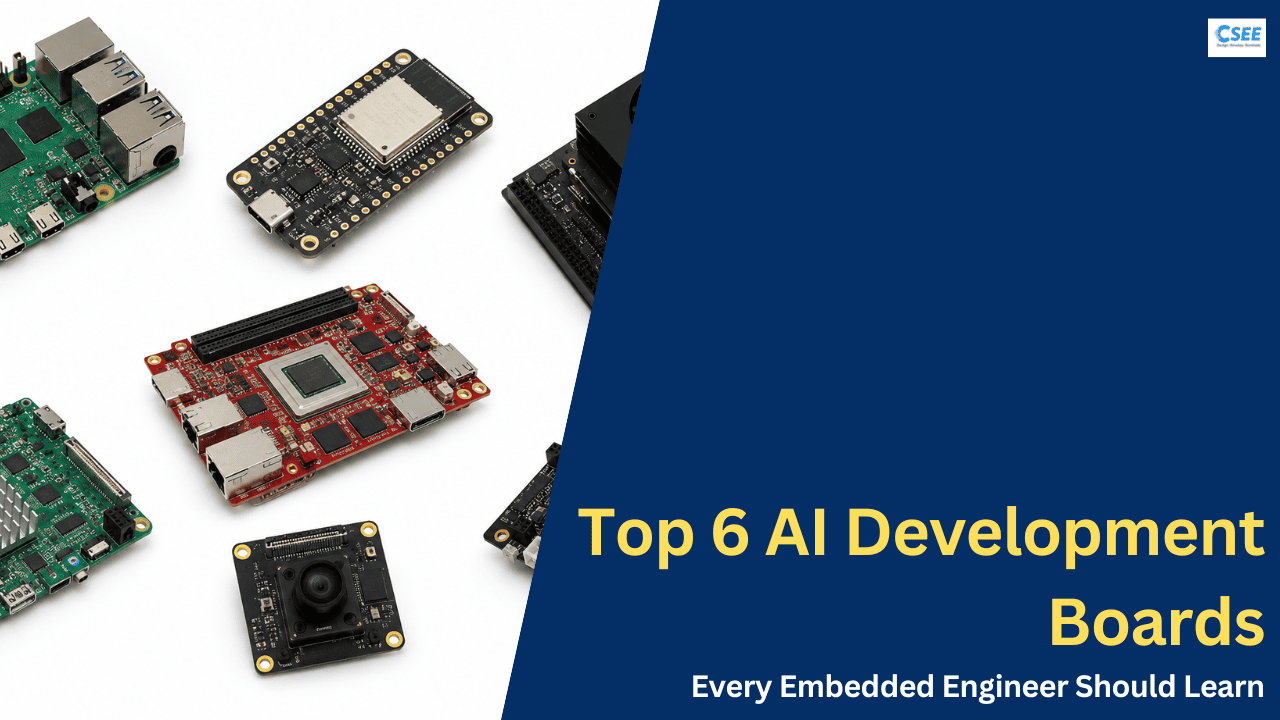
Which board should I use to deploy an AI model?
Six popular boards, one honest question: where does your model actually belong? This guide walks the full spectrum — from a coin-cell microcontroller to a reconfigurable FPGA — with diagrams, spec tables, and a decision path you can follow.
There is no “best” board — only the best fit for your model, your power budget, and your patience
Newcomers to embedded machine learning often ask a version of the same question: “I trained a model — which board do I buy to run it?” It feels like it should have a single answer. It does not, and that is genuinely good news, because it means the six boards in this guide are not really competitors. They are six different points on a spectrum of compute, and each one earns its place by being the right tool for a particular shape of problem.
A wake-word detector that has to run for a year on two AA batteries lives in a completely different universe from a warehouse robot that fuses four camera feeds and a language model in real time. If you tried to force the first job onto a power-hungry GPU module, you would drain the batteries in an afternoon. If you tried to force the second job onto a microcontroller, it would never even boot the model. The skill is not picking a “winner” — it is locating your problem on the spectrum and then choosing the board that sits closest to it.
This guide is built to help you do exactly that. We start with the handful of concepts you need to compare boards honestly (what “TOPS” really means, why quantization matters, the difference between training and inference). Then we place all six boards on a single visual spectrum. After that, each board gets a full profile — architecture, AI acceleration, the software toolchain, the real deployment workflow, power and thermal behavior, strengths, limitations, and the projects it was born for. We finish with head-to-head tables, a decision flowchart, a generic deployment pipeline, common pitfalls, a getting-started checklist, and an FAQ. No links, no menus — just a long read you can scroll top to bottom.
What “deploying an AI model” on a board actually means
Before comparing hardware, it helps to be precise about the job. When people say “deploy an AI model,” they almost always mean inference — running a model that has already been trained, so it can make predictions on new data. This is different from training, which is the compute-heavy process of teaching the model in the first place. Training happens on beefy machines in the cloud or on a workstation with a big GPU. Inference is what you push out to the edge — onto the boards in this guide.
Understanding that split is the single most clarifying idea in edge AI. None of these six boards is meant to train large models from scratch. They exist to take a finished model and execute it quickly, cheaply, and close to where the data is generated — a camera, a microphone, a vibration sensor. Running inference at the edge instead of in the cloud buys you three things: lower latency (no round trip to a server), better privacy (data never leaves the device), and offline operation (no network required). The cost is that you have to fit your model into a much smaller compute envelope.
This reframes the buying question in a useful way. You are not shopping for “an AI computer” in the abstract; you are shopping for the cheapest, coolest, most reliable device that can execute your specific finished model at your required speed within your power budget. Every board in this guide can run some model well and some model badly. The art is in the matching, and the matching depends entirely on the four things only you know: how big your model is, how fast it must respond, where the device will live, and how many of them you eventually need to build. Hold those four facts in mind as you read, and the six profiles below will sort themselves into a clear order of preference for your particular case.
The five metrics that decide everything
You can compare any edge board honestly with just five numbers and one caveat. Learn these and the marketing noise falls away.
- TOPS — Tera-Operations Per Second. A rough ceiling on how many low-precision math operations the AI accelerator can do. Higher means bigger or faster models. But TOPS is a peak theoretical figure; real throughput is often a fraction of it, and a microcontroller with no accelerator is best measured in operations per second, not tera-anything.
- MEMORY — RAM and bandwidth. A model must physically fit in memory alongside its working data. Bandwidth (GB/s) governs how fast weights stream to the compute units. This is frequently the real bottleneck, not TOPS. An 8 GB board can hold models a 512 KB microcontroller cannot even contemplate.
- POWER — Watts under load. Determines battery life, thermal design, and where you can physically deploy the board. A 0.5 W part and a 25 W part are not the same category of device even if both “do AI.”
- LATENCY — Time per inference. How long one prediction takes. For a doorbell it can be 500 ms; for a robot arm or a machine-vision reject gate it must be a few milliseconds and, crucially, predictable.
- THROUGHPUT — Inferences per second (or FPS). How many predictions per second you can sustain. Vision people usually think in frames per second; this is throughput by another name.
The caveat is numerical precision. Edge accelerators are fast because they work in low precision — usually 8-bit integers (INT8) rather than the 32-bit floats (FP32) used in training. Converting a model to run efficiently at INT8 is called quantization, and it is the beating heart of edge deployment. Quantization shrinks the model, slashes memory bandwidth, and unlocks the accelerator — often with only a tiny accuracy loss. Some boards (Coral, the Hailo NPUs, the Kria DPU, the ESP32-S3) essentially require INT8 quantized models. Others (Jetson) happily run higher precision too. If you remember one workflow word from this guide, make it quantize.
Every deployment follows the same six-step pipeline
No matter which board you choose, getting a model from your laptop onto the hardware follows the same arc. What changes between boards is the tooling at each step and how much of it is automated. Keep this pipeline in your head as you read the board profiles — each one is really a different implementation of these six stages.
Five hardware classes, six boards
The six boards fall into five architectural classes, and knowing the class tells you most of what you need before you even read a spec sheet. A microcontroller (MCU) like the ESP32-S3 has no operating system in the usual sense, kilobytes of RAM, and sips microwatts — it runs the very smallest models. A single-board computer (SBC) like the Raspberry Pi 5 or the Coral Dev Board runs full Linux, has gigabytes of RAM, and can host a real software stack; the AI acceleration is either bolted on (Pi’s HAT) or built into the module (Coral’s Edge TPU). A plug-in NPU accelerator like the Hailo-8 AI Kit is not a computer at all but a dedicated inference chip on an M.2 card that you add to a host, trading standalone convenience for exceptional throughput-per-watt. A GPU module like the Jetson Orin Nano pairs an Arm CPU with a programmable graphics processor and tensor cores, giving you the most flexible high-end compute and the ability to run modern transformers and language models. And an FPGA / adaptive SoC like the Kria KV260 lets you build a custom hardware datapath in reconfigurable logic, trading ease-of-use for deterministic latency and unbeatable efficiency on fixed pipelines.
With those mental models in place, let’s profile each board in turn — moving left to right along the spectrum, from the leanest to the heaviest.
ESP32-S3
The tiny, ubiquitous, dollar-store champion of always-on AI. If your model is small and your power budget is measured in milliwatts, start here.
The ESP32-S3 is not, in the strict sense, an “AI board” at all — it is a general-purpose Wi-Fi and Bluetooth microcontroller that happens to be very good at running the smallest class of machine-learning models. That framing matters. You do not buy an ESP32-S3 to run a large vision network at high frame rates; you buy it because it costs a few dollars, fits on a coin-sized module, runs from a battery for months, and can still execute a quantized neural network on the same chip that reads your sensors and talks to the cloud. This is the world of TinyML: models measured in kilobytes, doing one focused job extremely efficiently.
Architecture & AI acceleration
At its heart sits a dual-core Xtensa LX7 processor running at up to 240 MHz, paired with 512 KB of on-chip SRAM and, on most modules, several megabytes of external PSRAM and flash. Crucially, the LX7 core includes vector (SIMD) instruction extensions that Espressif’s software libraries exploit to accelerate the multiply-accumulate operations at the core of neural networks. There is no dedicated NPU or GPU — the “acceleration” is these vector instructions plus hand-optimized kernels. That is enough to run keyword spotting, wake-word detection (“Hey device…”), simple gesture and motion classification, vibration and anomaly detection on sensor streams, and even small convolutional networks for low-resolution person or face detection on the camera-equipped ESP32-S3-EYE development board.
Because there is no accelerator to feed with high-precision data, everything runs as INT8 quantized models, and the models must be tiny — typically well under a megabyte, often just tens of kilobytes. The two software paths are Google’s TensorFlow Lite for Microcontrollers (TFLite-Micro) and Espressif’s own ESP-DL / ESP-NN libraries, which provide optimized INT8 kernels for the S3’s vector unit. You train and quantize on your PC, convert to a C array, compile it into your firmware, and flash the whole thing to the chip.
| Class | Microcontroller (MCU) — bare-metal / RTOS, no Linux |
|---|---|
| Compute | Dual Xtensa LX7 @ 240 MHz with SIMD; sub-TOPS, measured in millions of ops/s |
| Memory | 512 KB SRAM on-chip; up to 8–16 MB PSRAM + up to 32 MB flash (external) |
| AI software | TensorFlow Lite for Microcontrollers · ESP-DL / ESP-NN (INT8 only) |
| Model size | Kilobytes to a few hundred KB — wake-word, KWS, tiny CNN, sensor ML |
| Connectivity | Wi-Fi 4 + Bluetooth LE 5 built in; rich GPIO, I2S mics, camera (DVP) |
| Power | ~0.1–0.5 W active · µA in deep sleep |
| Typical price | ~$5–15 module/dev board · ~$25–50 ESP32-S3-EYE |
Where it shines
- Unbeatable cost — a few dollars per unit for mass deployment
- True battery operation: months on a coin cell with deep sleep
- Wi-Fi + BLE on-chip, so it is a complete IoT node, not just an accelerator
- Huge community, Arduino & ESP-IDF support, endless tutorials
- Runs sensor, radio, and model on one tiny, rugged chip
Where it struggles
- Only the smallest models fit — no room for large vision nets or any LLM
- Low frame rates on camera work (single-digit FPS for detection)
- INT8-only; you must quantize aggressively and accept accuracy trade-offs
- No operating system conveniences — you work in C/C++ firmware
- Debugging on-device ML is fiddlier than on a Linux board
Getting started, in practice
- Install the ESP-IDF toolchain (or the Arduino core) and confirm you can flash a blink sketch to the board.
- Train a small classifier on your PC — for example a keyword-spotting model — and quantize it to INT8 TensorFlow Lite.
- Convert the .tflite file into a C byte-array and drop it into your firmware project.
- Link against TFLite-Micro or ESP-DL, wire up the input (mic via I2S, or camera on the S3-EYE), and run the interpreter in your main loop.
- Flash, watch the serial monitor for predictions, then tune quantization and buffer sizes until it fits in SRAM and hits your latency target.
Choose the ESP32-S3 when the model is tiny, the device runs on a battery, and you plan to ship it in volume. It is the correct answer for wake-word wearables, smart sensors, and always-on IoT nodes where a Raspberry Pi would be absurd overkill and its power draw a non-starter. The moment you need real-time video analytics, a large model, or a Linux userland, you have outgrown this tier — move one step right.
Google Coral Dev Board
A purpose-built inference machine. When your job is a fixed vision model and every milliwatt counts, the Edge TPU is a scalpel.
The Coral Dev Board answers a very specific question: how do you run a fixed, well-defined vision model as efficiently as physically possible? Google’s answer was to design a dedicated Edge TPU — an application-specific integrated circuit (ASIC) that does one thing, the linear-algebra that underpins neural networks, and does it at roughly 2 TOPS per watt. The result is a small single-board computer that can run a model like MobileNet v2 at close to 400 frames per second while drawing about 2 watts for the accelerator. That efficiency is the entire pitch.
Architecture & AI acceleration
The board is built around a removable system-on-module (SOM) based on the NXP i.MX 8M — a quad-core Arm Cortex-A53 with a Cortex-M4 companion, 1 or 4 GB of LPDDR4, eMMC storage, and on-board Wi-Fi and Bluetooth. It runs Mendel Linux, a Debian derivative, so you get a familiar Linux userland with Python and the PyCoral library. The star is the Edge TPU coprocessor soldered onto the SOM. Because the SOM is detachable and available separately, the Coral platform is explicitly designed to let you prototype on the Dev Board and then move the same module into your own custom hardware for production — a genuinely useful path to manufacturing.
The Edge TPU’s power is also its constraint. It runs only INT8-quantized TensorFlow Lite models, and only after they are passed through the Edge TPU Compiler, which maps supported operations onto the ASIC. Operations the compiler does not support fall back to the CPU, which quickly erases the speed advantage. In practice this means Coral excels at the well-trodden vision architectures — MobileNet, EfficientNet-Lite, SSD detectors, pose estimators — and is a poor fit for exotic layers, transformers, or anything you cannot cleanly quantize to INT8. You choose Coral when your model is a known, quantizable convolutional network, not when you want to experiment with the latest research.
| Class | Linux SBC with dedicated inference ASIC (Edge TPU) |
|---|---|
| Compute | 4 TOPS (INT8) on the Edge TPU · i.MX 8M quad Cortex-A53 host |
| Memory | 1 or 4 GB LPDDR4 · 8/16 GB eMMC |
| AI software | TensorFlow Lite (INT8) via the Edge TPU Compiler · PyCoral · Mendel Linux |
| Best models | MobileNet, EfficientNet-Lite, SSD detectors, pose nets — quantizable CNNs |
| Power | ~2 W for the TPU; a few watts board-wide |
| Typical price | Historically ~$130–170 (check availability, see note) |
Where it shines
- Class-leading performance-per-watt for fixed CNN vision
- ~2 W accelerator makes fanless, low-heat designs easy
- Detachable SOM gives a clean prototype-to-production path
- Simple, opinionated toolchain when your model is supported
Where it struggles
- INT8 TFLite only, with a narrow supported-op set — no transformers/LLMs
- Unsupported ops fall back to CPU and kill the speed advantage
- Ecosystem momentum has slowed; availability is patchy
- Modest host CPU and RAM for anything beyond the inference itself
Choose Coral when you have a specific, quantizable vision model and efficiency is the priority. For a battery-conscious smart camera running MobileNet-style detection all day, few things beat the Edge TPU on watts. But it is a specialist, not a generalist — if you want flexibility, the latest architectures, or a lively ecosystem, the Raspberry Pi 5 (optionally with its own Hailo NPU) or the Jetson are safer bets today.
Hailo-8 AI Kit
Not a board on its own, but the accelerator that supercharges one. It bolts a data-center-class vision NPU onto a host you already own — and sips power doing it.
The Hailo-8 AI Kit is different in kind from the other entries here: it is not a complete computer but an M.2 accelerator module built around Hailo’s 26-TOPS Hailo-8 processor, designed to plug into a host such as a Raspberry Pi 5 or any Linux machine with an M.2 or PCIe slot. What makes it remarkable is the efficiency. It delivers its full 26 TOPS at roughly 2.5 watts typical — on the order of 10 TOPS per watt, several times more efficient than the general-purpose boards and comfortably ahead of the Coral Edge TPU, while offering far more headroom. If your problem is high-throughput or multi-stream vision and power matters, this is the standout on the whole spectrum.
Architecture & AI acceleration
The Hailo-8 uses a proprietary dataflow architecture: rather than shuttling data back and forth to external memory, the compiler lays the neural network out spatially across the chip, so activations flow from layer to layer on-chip. A practical consequence is that the module needs no external DRAM of its own — a single-chip solution that keeps the board small and the power low. It connects over PCIe Gen 3 in a standard M.2 form factor (keys M, B+M and A+E, 2242 with breakable extensions), and is rated for the industrial −40 °C to 85 °C range, which is why it shows up in real products and not just hobby projects.
Because it is an accelerator, you pair it with a host that runs the operating system, drives the camera, and does pre- and post-processing; the Hailo handles inference. Models come in through the Hailo Dataflow Compiler, which ingests TensorFlow, TensorFlow Lite, ONNX, Keras or PyTorch and emits a compiled HEF file that the HailoRT runtime executes. Like the other fixed-function accelerators it is happiest with INT8-quantized convolutional vision models, and it is scalable — a single device can run multiple streams and multiple models at once, and you can even fit several Hailo-8s to a host. This is the exact silicon that powers the 26-TOPS versions of the Raspberry Pi AI HAT+, so choosing “the Hailo-8” and “a Pi 5 with the 26-TOPS HAT” are two names for much the same capability.
| Class | M.2 / PCIe NPU accelerator module (needs a Linux host) |
|---|---|
| Compute | 26 TOPS (INT8) on the Hailo-8 dataflow processor |
| Memory | On-chip only — no external DRAM; uses the host’s RAM/storage |
| AI software | Hailo Dataflow Compiler → HEF · HailoRT · TF/TFLite/ONNX/Keras/PyTorch |
| Best models | INT8 vision CNNs — detection, segmentation, pose — at high FPS / multi-stream |
| Power | ~2.5 W typical (~10 TOPS/W) |
| Typical price | ~$110–140 module (+ host & M.2/PCIe adapter) |
Where it shines
- Best-in-class efficiency: ~26 TOPS at ~2.5 W (~10 TOPS/watt)
- High-FPS and genuine multi-stream, multi-model vision
- Standard M.2 / PCIe form factor — drops into many hosts
- Broad framework intake (TF, TFLite, ONNX, Keras, PyTorch); industrial temperature range
Where it struggles
- Not standalone — needs a host SBC and an M.2/PCIe adapter
- Vision-NPU focus; INT8 CNNs, not a home for LLMs/VLMs
- Compiling models with unsupported ops takes real effort
- Overlaps with the Pi AI HAT+ — decide which packaging you want
Choose the Hailo-8 AI Kit when you need serious vision throughput per watt. For a multi-camera detector, a high-frame-rate inspection line, or any always-on vision product where the Coral runs out of headroom but a Jetson’s power budget is too high, the Hailo-8 is the sweet spot. Just remember it is an accelerator: budget for a host and, if you are on a Raspberry Pi anyway, weigh buying it pre-integrated as the 26-TOPS AI HAT+.
Raspberry Pi 5
The default first board for a reason. A full Linux computer that scales from “no accelerator” to “40 TOPS” by bolting on a HAT.
If you are learning edge AI, or you want maximum flexibility with minimum friction, the Raspberry Pi 5 is the pragmatic starting point. On its own it is a capable quad-core Linux desktop-in-miniature with no dedicated AI accelerator — you can run TensorFlow Lite, ONNX, or PyTorch models directly on its CPU, but only slowly, which is fine for light or intermittent workloads. What transforms it into a serious inference platform is the AI HAT+ family: add-on boards carrying a Hailo neural processing unit that connect over the Pi 5’s PCIe Gen 3 interface and take on the heavy lifting.
Architecture & AI acceleration
The Pi 5 pairs a Broadcom BCM2712 — quad-core Arm Cortex-A76 at 2.4 GHz — with 2, 4, 8, or 16 GB of LPDDR4X and the full Raspberry Pi OS Debian environment. That means a real Linux userland: apt packages, Python, containers, a desktop, the vast Pi community, and native camera frameworks. The AI acceleration is modular. The AI HAT+ ships in a 13 TOPS version (Hailo-8L) and a 26 TOPS version (Hailo-8), and the newer AI HAT+ 2 offers 40 TOPS on a Hailo-10H with its own 8 GB of memory, explicitly aimed at running larger vision-language and small language models on the edge. The accelerator is auto-detected by the OS, and the built-in rpicam-apps and Picamera2 frameworks can offload compatible post-processing — object detection, segmentation, pose estimation — to the NPU automatically.
The Hailo toolchain follows the familiar pattern: you train in TensorFlow or PyTorch, export to ONNX or TFLite, then use the Hailo Dataflow Compiler to quantize and compile the model into a Hailo Executable Format (.hef) file that runs on the NPU. Hailo publishes a model zoo of pre-compiled networks so you can be running real-time detection within an hour of unboxing. The combination is potent: a friendly, well-documented, endlessly supported computer for the parts of your project that are not AI, plus a genuinely fast NPU for the parts that are.
| Class | General-purpose Linux SBC with optional bolt-on NPU |
|---|---|
| Compute | CPU-only by default; +13 / +26 / +40 TOPS with an AI HAT+ |
| Memory | 2–16 GB LPDDR4X (board) · AI HAT+ 2 adds 8 GB for the NPU |
| AI software | TF / TFLite / ONNX / PyTorch on CPU · Hailo Dataflow Compiler for the NPU |
| Best models | Object detection, segmentation, pose; VLMs/small LLMs on the 40 TOPS HAT |
| Power | ~5–12 W board + a few W for the HAT · 27 W USB-C PD recommended |
| Typical price | Pi 5 8 GB ~$80 · HAT+ 13T ~$70 · 26T ~$110 · HAT+ 2 40T ~$130 |
Prices are approximate and vary by region and retailer. The beauty of the platform is that you can start CPU-only and add a HAT later.
Where it shines
- Full Linux — the easiest environment for building the whole application
- Scalable: begin CPU-only, then choose 13/26/40 TOPS by choosing a HAT
- Best-in-class documentation, community, and accessory ecosystem
- Native camera stack auto-offloads vision tasks to the NPU
- Excellent for learning, prototyping, and hobby robotics
Where it struggles
- CPU-only inference is slow — you almost always want the HAT for real-time vision
- Not the raw ceiling of the Jetson for heavy generative AI
- Not deterministic like the Kria FPGA for hard-real-time pipelines
- Two-board stack (Pi + HAT) adds cost, height, and thermal planning
Getting started, in practice
- Flash Raspberry Pi OS to a microSD or NVMe drive and boot the Pi 5; get a camera working with Picamera2.
- Fit the AI HAT+ over the PCIe connector; the OS auto-detects the Hailo NPU on next boot.
- Run a pre-compiled model from the Hailo model zoo to confirm real-time detection end to end.
- When ready for your own model, train and export to ONNX, then compile to a .hef with the Hailo Dataflow Compiler.
- Wire the model into rpicam-apps or your own Python app, and iterate on accuracy and frame rate.
Choose the Raspberry Pi 5 when you value flexibility, ease, and a real Linux computer — and let the HAT scale the AI to your needs. It is the best all-round choice for makers, students, and prototypes, and with the 26 or 40 TOPS HAT it handles serious real-time vision and even lightweight language models. Reach past it only when you need the Jetson’s generative-AI headroom or the Kria’s hard-real-time determinism.
Jetson Orin Nano Super
The richest software stack in edge AI, and enough raw compute to run transformers, vision-language models, and small LLMs on the device itself.
When your ambitions outgrow fixed convolutional vision — when you want to run modern transformer architectures, vision-language models, or a small large-language model locally — the Jetson Orin Nano is the board that says yes. NVIDIA’s late-2024 “Super” update was unusually generous: an existing 40 TOPS developer kit was boosted to 67 TOPS purely through a software power-mode change, and the price was cut to $249. Owners of the original kit unlocked the full performance by flashing the latest JetPack — no new hardware required. That combination of raw programmable compute, a mature ecosystem, and an aggressive price is what makes the Orin Nano the default choice for edge generative AI and robotics.
Architecture & AI acceleration
The Orin Nano module pairs a 6-core Arm Cortex-A78AE CPU with a 1024-core NVIDIA Ampere GPU that includes 32 dedicated Tensor Cores, backed by 8 GB of LPDDR5 at 102 GB/s of bandwidth in Super mode. Unlike a fixed-function ASIC, the GPU is fully programmable, so it runs essentially any model architecture you can express in a mainstream framework — CNNs, transformers, diffusion models, LLMs — without being limited to a curated operation set. This is the single biggest differentiator: the Jetson does not force you to fit a narrow mold.
The software story is the other half of the value. JetPack provides an Ubuntu-based Linux environment with the full CUDA, cuDNN, and TensorRT stack. You develop in PyTorch or TensorFlow, then optimize with TensorRT — which quantizes (INT8, or FP16 for accuracy-sensitive work), fuses layers, and tunes kernels for the specific GPU — to squeeze out maximum throughput. NVIDIA’s container registry and the Jetson AI Lab supply ready-to-run examples for LLMs, vision-language models, and robotics, so you can stand up a local chatbot or a multi-camera perception pipeline quickly. Because the same CUDA programming model spans the cloud, the workstation, and the edge, skills and code transfer cleanly across all three — a strategic advantage no other board here can match.
| Class | GPU-accelerated edge AI module + carrier (Linux) |
|---|---|
| Compute | 67 TOPS (INT8) · 1024-core Ampere GPU + 32 Tensor Cores · 6-core A78AE |
| Memory | 8 GB LPDDR5 · 102 GB/s bandwidth |
| AI software | JetPack (Ubuntu) · CUDA · cuDNN · TensorRT · PyTorch/TF/ONNX |
| Best models | Transformers, vision-language models, small LLMs, multi-stream vision, robotics |
| Power | 7–25 W configurable · active cooling required |
| Typical price | $249 developer kit (Super) |
Where it shines
- Runs any architecture — CNNs, transformers, VLMs, small LLMs
- The most mature edge AI software stack (CUDA/TensorRT/JetPack)
- Code and skills transfer directly to and from cloud GPUs
- Excellent price-to-performance since the Super update ($249, 67 TOPS)
- Strong robotics ecosystem and ready-to-run generative-AI examples
Where it struggles
- Higher power and heat — needs active cooling, not battery-friendly
- More expensive than an MCU or a bare SBC
- 8 GB caps the size of LLMs you can run locally
- Not deterministic-real-time like an FPGA for hard control loops
- Steeper learning curve than a Raspberry Pi for absolute beginners
Getting started, in practice
- Flash the JetPack SD-card image (or use SDK Manager) and boot into the Ubuntu desktop.
- Set the power mode to MAXN / Super to unlock the full 67 TOPS.
- Pull a ready-made container from the Jetson AI Lab — a local LLM or a detection pipeline — to verify the GPU end to end.
- Bring your own PyTorch/ONNX model and optimize it with TensorRT (INT8 or FP16) for maximum throughput.
- Integrate into your application (often with DeepStream for multi-camera vision or a robotics framework), then tune power mode versus performance.
Choose the Jetson Orin Nano when you need generative AI, transformers, or serious multi-stream vision at the edge, and when a rich, transferable software stack matters. It is the most future-proof board here for modern model architectures. Accept the trade-offs — more power, active cooling, a higher price — because they buy you capability nothing else on this list can offer. If your model is a small fixed CNN on a battery, this is overkill; if it is a language or vision-language model, this is the entry point.
Kria KV260 Vision AI Starter Kit
Reconfigurable hardware for people who need deterministic, low-latency, multi-camera vision — and a clean path to industrial production.
The Kria KV260 is the odd one out, and deliberately so. The other four boards run your model on a fixed processor — a CPU, an ASIC, a GPU. The Kria lets you build the datapath itself in reconfigurable logic. At its core is AMD’s Zynq UltraScale+ MPSoC, which combines a conventional Arm processor with a field-programmable gate array (FPGA). On that fabric you instantiate a Deep Learning Processing Unit (DPU) — a configurable inference engine — and, because the pixels can flow from camera to preprocessing to DPU to output entirely inside the hardware, you get something the other boards cannot promise: deterministic, cycle-predictable latency and outstanding performance-per-watt on fixed pipelines. That is exactly what industrial machine vision, smart cameras, and safety-relevant control loops need.
Architecture & AI acceleration
The KV260 pairs the production-grade K26 system-on-module — a quad-core Arm Cortex-A53, dual Cortex-R5F real-time cores, the FPGA programmable logic, a hardened video codec, and 4 GB of DDR4 — with a vision-focused carrier card. That carrier is the point: it exposes multiple camera interfaces (up to eight, via an onsemi IAS MIPI connector with auto-focus after the 2025 refresh, plus a Raspberry Pi camera connector), a dedicated hardware image signal processor (the onsemi AP1302) that offloads debayering and HDR, HDMI and DisplayPort output, gigabit Ethernet, USB, and Pmod expansion. A TPM 2.0 module and secure boot round out a package built for trusted, deployable edge products.
AMD’s Vitis AI environment is how you get a model onto the DPU: you quantize a TensorFlow or PyTorch model to INT8, then compile it to an xmodel targeted at your DPU configuration. AMD promises that, thanks to a library of pre-built accelerated applications and the Kria App Store, you can be running vision applications in under an hour with no FPGA experience — a real change from the historically steep FPGA learning curve. The deeper power, though, is that FPGA engineers can customize everything: instantiate multiple DPUs, add custom preprocessing in logic, or build a bespoke pipeline that a fixed processor could never match on latency or efficiency. And because the K26 SOM is a production part with a multi-year lifecycle, the KV260 is a genuine prototype-to-volume path, not just an evaluation toy.
| Class | FPGA / adaptive SoC (Zynq UltraScale+ MPSoC) vision starter kit |
|---|---|
| Compute | Configurable DPU in FPGA fabric — measured by latency & perf/watt, not fixed TOPS |
| Memory | 4 GB DDR4 on the K26 SOM |
| AI software | Vitis AI — quantize + compile TF/PyTorch to xmodel for the DPU |
| Best models | Fixed vision pipelines: detection, classification, segmentation across many cameras |
| Standout I/O | Up to 8 camera interfaces · hardware ISP · video codec · TPM 2.0 · secure boot |
| Power | ~10–20 W depending on configuration |
| Typical price | ~$249 MSRP (some distributors ~$284) · power supply often separate |
Where it shines
- Deterministic, low, predictable latency — ideal for control and inspection
- Multi-camera throughput with hardware ISP and codec offload
- Excellent performance-per-watt on fixed pipelines
- Production-grade K26 SOM with a multi-year lifecycle
- Pre-built apps let you start without FPGA expertise
Where it struggles
- Steepest learning curve to go beyond the pre-built apps
- Vitis AI toolchain is heavier and less beginner-friendly
- Not aimed at experimental architectures, LLMs, or rapid model churn
- Smaller hobbyist community than Pi or Jetson
- Overkill (and awkward) for single-camera hobby projects
Getting started, in practice
- Download the Kria starter SD-card image, flash it, and boot the KV260 to Linux.
- Run a pre-built accelerated application (e.g. a smart-camera detection demo) from AMD’s library to see the DPU working end to end.
- Install Vitis AI; quantize your TensorFlow/PyTorch model to INT8 and compile it to an xmodel for the target DPU configuration.
- Deploy the model into the pipeline, connecting your camera(s) through the IAS or Raspberry Pi interface.
- If you need more, move into Vitis/Vivado to customize the DPU count or add hardware preprocessing — then migrate to the K26 SOM for production.
Choose the Kria KV260 when you need deterministic latency, many camera streams, or a production path for an industrial vision product. It rewards teams building a fixed, high-value pipeline — factory inspection, smart-city cameras, machine vision — where predictable timing and performance-per-watt outweigh flexibility. If you are experimenting, iterating on model architectures, or building a one-off hobby project, its power will mostly go unused and its toolchain will slow you down; pick the Pi or Jetson instead.
All six boards, side by side
Profiles tell you the character of each board; tables let you weigh them against each other on the same axes. The master table below is wide — on a phone, scroll it sideways, and the board name column stays pinned so you never lose your place. After it come qualitative ratings, two charts, and a model-format matrix.
| Board | Class | AI compute | Memory | Power | Software | Runs LLMs? | Price* |
|---|---|---|---|---|---|---|---|
| ESP32-S3 | MCU | Sub-TOPS (CPU SIMD) | 512 KB SRAM | ~0.5 W | TFLite-Micro, ESP-DL | No | $5–15 |
| Coral Dev Board | SBC + ASIC | 4 TOPS (Edge TPU) | 1–4 GB | ~2 W (TPU) | TFLite + Edge TPU Compiler | No | ~$130–170 |
| Hailo-8 AI Kit | NPU module (M.2) | 26 TOPS (Hailo-8) | on-chip (host RAM) | ~2.5 W | Dataflow Compiler, HailoRT | No (vision NPU) | ~$110–140 |
| Raspberry Pi 5 | SBC (+NPU) | 0 → 13/26/40 TOPS (HAT) | 2–16 GB | ~5–12 W +HAT | Linux; Hailo compiler | Small, on 40 TOPS HAT | $80 +HAT |
| Jetson Orin Nano | GPU module | 67 TOPS (Ampere) | 8 GB LPDDR5 | 7–25 W | CUDA, TensorRT, JetPack | Yes (small) | $249 |
| Kria KV260 | FPGA | Configurable DPU | 4 GB DDR4 | ~10–20 W | Vitis AI | Not the target | ~$249–284 |
*Approximate, region- and retailer-dependent, and excluding accessories such as power supplies, cameras, or storage. Verify current pricing before buying.
| Board | Ease of use | Raw AI power | Power efficiency | Flexibility | Real-time / latency | Ecosystem |
|---|---|---|---|---|---|---|
| ESP32-S3 | ●●●●○ | ●○○○○ | ●●●●● | ●●○○○ | ●●●○○ | ●●●●● |
| Coral Dev Board | ●●●○○ | ●●○○○ | ●●●●● | ●○○○○ | ●●●●○ | ●●○○○ |
| Hailo-8 AI Kit | ●●●○○ | ●●●●○ | ●●●●● | ●●○○○ | ●●●●○ | ●●●○○ |
| Raspberry Pi 5 | ●●●●● | ●●●○○ | ●●●○○ | ●●●●● | ●●●○○ | ●●●●● |
| Jetson Orin Nano | ●●●○○ | ●●●●● | ●●○○○ | ●●●●● | ●●●○○ | ●●●●○ |
| Kria KV260 | ●●○○○ | ●●●●○ | ●●●●○ | ●●●●○ | ●●●●● | ●●○○○ |
Ratings are relative to one another within this group and reflect typical use, not absolute limits. “Flexibility” means breadth of model architectures supported; “real-time” means predictability of latency.
| Capability | ESP32-S3 | Coral | Hailo-8 | Pi 5 | Jetson | Kria |
|---|---|---|---|---|---|---|
| INT8 quantized CNNs | ✔ tiny | ✔✔ | ✔✔ | ✔✔ | ✔✔ | ✔✔ |
| FP16 / higher precision | — | — | — | CPU only | ✔✔ | limited |
| Transformers / ViT | — | — | limited | ✔ (40T HAT) | ✔✔ | ✔ (custom) |
| Small LLMs / VLMs | — | — | — | ✔ (40T HAT) | ✔✔ | — |
| PyTorch native path | — | via TFLite | via DFC | ✔ (CPU) | ✔✔ | via Vitis AI |
| Multi-camera vision | 1 low-res | 1 | multi-stream | 1–2 | 2+ | up to 8 |
| Deterministic latency | ✔ | ✔ | ✔ | — | — | ✔✔ |
✔✔ = strong, native support · ✔ = supported · limited/via = possible with caveats · — = not a fit. “40T HAT” means the Raspberry Pi AI HAT+ 2 (40 TOPS).
Follow the flowchart
Here is the whole guide compressed into a single path. Start at the top and answer each question honestly about your project — not the project you wish you were building. The first “yes” is usually your board.
Seven real scenarios
Abstract questions are easier to answer against concrete situations. Here are seven common projects and the board each one points to — and, just as usefully, the boards to avoid.
| Your project | Pick | Why | Avoid |
|---|---|---|---|
| Battery wake-word wearable | ESP32-S3 | Months on a cell; model is a few KB; Wi-Fi/BLE on-chip. | Jetson (power), Kria (power) |
| Learn edge AI / first camera project | Raspberry Pi 5 | Easiest Linux, best docs; add a HAT when you need speed. | Kria (too steep to start) |
| Solar-powered wildlife camera | Coral (or ESP32-S3) | ~2 W Edge TPU runs a fixed detector all day on little power. | Jetson (power budget) |
| Local chatbot / vision-language demo | Jetson Orin Nano | Only board here that comfortably runs transformers and small LLMs. | ESP32, Coral, Kria |
| Factory reject-gate inspection (4 cameras) | Kria KV260 | Deterministic latency + multi-camera + hardware ISP; production path. | Pi/Coral (timing jitter) |
| Multi-stream video analytics on a low-power host | Hailo-8 AI Kit | 26 TOPS at ~2.5 W; runs several camera streams at once beside a Pi 5. | ESP32, Coral (throughput) |
| Hobby robot with real-time object detection | Pi 5 + 26T HAT | Flexible, affordable, fast enough; huge robotics community. | ESP32 (too small) |
Seven mistakes that trip up first-time deployers
Choosing the board is half the battle; the other half is not sabotaging yourself with avoidable errors. These are the traps that catch nearly everyone the first time.
1 · Trusting the TOPS number too much
Marketing leads with peak TOPS because it is the biggest, most impressive figure. But peak TOPS assumes perfect utilization that real models never achieve. Actual throughput depends on your specific architecture, how well it maps to the accelerator, memory bandwidth, and preprocessing overhead. A board rated at 26 TOPS may deliver only a fraction of that on your model. Always benchmark your network, not a vendor’s cherry-picked one.
2 · Forgetting that memory, not compute, is often the wall
People obsess over TOPS and ignore RAM. A model must fit in memory alongside its activation buffers and your application. This is why the ESP32-S3’s 512 KB is such a hard ceiling, and why the Jetson’s 8 GB caps the size of LLM you can run. Check the memory footprint of your quantized model before you fall in love with a board’s compute figure.
3 · Skipping quantization — or doing it carelessly
Most edge accelerators require INT8 models, and even where FP16 is possible, quantization is what unlocks real speed. But naive quantization can crater accuracy. Budget time for quantization-aware training or a good post-training calibration dataset, and always measure accuracy after quantizing, not before. A fast model that gives wrong answers is worthless.
4 · Assuming any model runs on any accelerator
Fixed-function accelerators like the Edge TPU and, to a lesser degree, the Hailo NPU and Kria DPU support a specific set of operations. If your model uses an unsupported layer, it either fails to compile or silently falls back to the CPU, destroying performance. Check the supported-operation list before you design your model, and prefer well-trodden architectures on fixed-function hardware. The GPU-based Jetson is the escape hatch when you need architectural freedom.
5 · Underestimating power and thermals
A Jetson or Kria under sustained load produces real heat and needs active cooling; throttling from an inadequate heatsink will quietly halve your throughput. Conversely, plan the power supply properly — a Raspberry Pi 5 with a HAT and a camera wants a proper 27 W USB-C PD source, not a phone charger. Power and heat are not afterthoughts; they are design constraints.
6 · Ignoring the production path
A developer kit that works beautifully on your desk is not automatically a product. If you intend to manufacture, ask early whether the module is available at volume with a long lifecycle. This is where the Coral SOM and especially the Kria K26 shine — they are designed for the prototype-to-production journey — while a hobbyist board may not be sourceable in the quantities or over the years you need.
7 · Buying the biggest board “to be safe”
Over-provisioning is as costly as under-provisioning. A Jetson running a job an ESP32 could handle wastes money, power, and board space, and adds cooling and complexity you did not need. Match the board to the model. The whole point of the spectrum is that the right-sized board is cheaper, cooler, and more robust than the biggest one.
A universal getting-started checklist
Whichever board you land on, this sequence keeps you out of trouble. It works because it front-loads the questions that are expensive to answer late.
- Define the job precisely. What is the input (audio, one camera, four cameras, a sensor stream)? What is the required latency and frame rate? What is the power source? Write these down — they select the board.
- Pick and train the model on a PC or cloud first. Get accuracy where you need it in full precision before worrying about hardware. Note the model’s size and operation types.
- Check accelerator compatibility. Confirm your model’s operations are supported by the target board’s toolchain, and that the quantized model fits in memory.
- Quantize and measure. Convert to INT8 (or FP16 on Jetson), then re-measure accuracy. If it drops too far, use quantization-aware training or a better calibration set.
- Compile with the vendor tool. Edge TPU Compiler (Coral), TensorRT (Jetson), Hailo Dataflow Compiler (Pi HAT), Vitis AI (Kria), or TFLite-Micro/ESP-DL (ESP32).
- Run a pre-built example first. Every platform ships demos. Get one working end to end so you know the toolchain and hardware are healthy before adding your own model.
- Deploy your model and benchmark on-device. Measure real latency, throughput, power, and temperature under sustained load — not a single cold-start inference.
- Plan for production early if this is more than a hobby: sourcing, lifecycle, cooling, enclosure, and updates.
What you’ll need to buy alongside the board
Boards rarely come complete. Budget for the extras so the kit actually boots the first evening.
- POWER A correctly rated supply — often not included (the Kria and many kits sell it separately; the Pi wants a 27 W USB-C PD unit).
- STORAGE A quality microSD card, or better, an NVMe SSD for the Pi 5 and Jetson — cheap cards corrupt and throttle.
- CAMERA A compatible camera module if you are doing vision (CSI/MIPI modules differ per board; the S3-EYE bundles one).
- COOLING An active cooler/heatsink for the Jetson, Kria, and a hard-working Pi 5 with a HAT.
- HAT For the Raspberry Pi, the separate AI HAT+ if you need real-time inference beyond CPU speed.
Frequently asked questions
Can I train a model on any of these boards?
Practically, no — these are inference devices. You train on a workstation or in the cloud and deploy the finished model. The Jetson can do small fine-tuning or on-device learning experiments thanks to its programmable GPU, but full training of anything substantial belongs on bigger hardware.
Which board is best for running a large language model locally?
The Jetson Orin Nano, comfortably. Its programmable GPU and 8 GB of LPDDR5 let it run small LLMs and vision-language models that fixed-function accelerators cannot touch. The Raspberry Pi 5 with the 40 TOPS AI HAT+ 2 can run smaller language and vision-language models too. The ESP32, Coral, and Kria are not the right tools for generative language models.
Do I really need an accelerator, or can the CPU handle it?
It depends on your latency target. A Raspberry Pi 5 CPU can run light or intermittent models acceptably. For real-time video analytics at usable frame rates, you want a dedicated accelerator — the HAT on the Pi, or a board with built-in acceleration. If the model is tiny and the rate is low, the CPU (or an MCU) may be plenty.
Why is the Kria measured differently from the others?
Because it is reconfigurable. On an FPGA you decide how much of the fabric to devote to inference, so there is no single fixed TOPS number — you trade logic resources for throughput and latency. AMD emphasizes deterministic latency and performance-per-watt on fixed pipelines, which are the metrics that matter for the industrial vision jobs the Kria targets.
Is the Coral Dev Board still worth buying in 2026?
The Edge TPU is still genuinely efficient for fixed, quantizable vision models, but availability of the Dev Board has become patchy and the ecosystem’s momentum has slowed. If you want the Edge TPU today, the USB Accelerator or M.2 module paired with another Linux host is often easier to source. Verify current stock and confirm your model fits the supported operations before committing.
I’m a complete beginner. Where should I start?
The Raspberry Pi 5. It has the gentlest learning curve, the best documentation, and the largest community, and it scales: start CPU-only, then add an AI HAT+ when you need speed. You will learn the whole deployment pipeline on friendly ground before graduating to a more specialised board.
How future-proof is my choice?
The programmable platforms age best. The Jetson’s GPU and the Kria’s FPGA can adapt to model architectures that do not exist yet, while fixed-function accelerators are tied to the operation sets they shipped with. If you expect your models to evolve rapidly, favour programmability; if your pipeline is fixed and you value efficiency, a specialised accelerator is fine.
Can I add AI acceleration to a board that does not have it?
Sometimes, yes. The clearest example is the Raspberry Pi, which is designed to accept the AI HAT+ over its PCIe connector, and the Coral USB Accelerator and M.2 module, which add an Edge TPU to almost any Linux host — including a Raspberry Pi. This modularity is a real advantage: you can start with a plain computer, prove your application on the CPU, and add dedicated acceleration only when your latency or frame-rate targets demand it, spreading cost and complexity over time rather than committing everything up front.
How do I actually measure whether a board is fast enough for my model?
Benchmark on the device itself, with your real model, under sustained load. A single cold-start inference is misleading because it excludes warm-up and thermal effects. Run the model continuously for several minutes, record the average and worst-case latency, the sustained frames per second, the power draw, and the temperature. Compare those against the requirements you wrote down at the start of the project. If the board hits your targets with headroom to spare, it is the right size; if it only just scrapes by, expect trouble once the enclosure traps heat, and consider the next board up.
What if my project sits between two boards?
That is common, and it usually means you should prototype on the more flexible of the two and let real measurements decide. If you are torn between the Coral and the Jetson, build first on the platform whose toolchain you know, benchmark your actual model, and see whether the efficient specialist is fast enough or whether you genuinely need the generalist’s headroom. Data from your own model beats any spec-sheet argument, and the cost of a second board is small next to the cost of committing an entire product to the wrong one.
The toolchain matters as much as the silicon
It is tempting to choose a board purely on its hardware specifications, but experienced practitioners will tell you the software ecosystem often decides whether a project succeeds or stalls. A powerful accelerator with an immature or poorly documented toolchain can be slower to ship on than a modest one with polished tools and a large community answering questions. When you commit to a board, you are also committing to its compiler, its model zoo, its debugging tools, its documentation, and the collective knowledge of everyone who has deployed on it before you. That ecosystem is where the hours of your project actually go.
Each of the six boards represents a distinct philosophy of software, and understanding those philosophies helps you predict where you will spend your effort. The ESP32-S3 lives in the embedded-firmware world: you work in C or C++ with the ESP-IDF framework or the Arduino core, and machine learning is one library among many you link into a firmware image. There is no operating system to lean on, but there is an enormous maker community and a decade of accumulated tutorials, which makes even hard problems searchable. The learning curve is about embedded development, not about AI specifically.
The Coral Dev Board takes an opinionated, narrow approach: TensorFlow Lite in, Edge TPU Compiler in the middle, PyCoral to run it. When your model fits that mold, the path is short and pleasant. When it does not, you hit a wall quickly, because the toolchain deliberately trades flexibility for simplicity. The Raspberry Pi 5 offers the opposite — a full, familiar Debian Linux userland where you can install almost anything, run models on the CPU with mainstream frameworks, and layer the Hailo toolchain on top when you add the HAT. Its greatest asset is not any single tool but the sheer breadth of its community; whatever obscure problem you hit, someone has almost certainly written it up.
The Jetson Orin Nano carries NVIDIA’s mature and expansive stack. CUDA is the same programming model used across data-center GPUs, so knowledge and code flow freely between cloud and edge. TensorRT is a genuinely sophisticated optimizer, JetPack bundles a coherent Ubuntu environment, and the Jetson AI Lab supplies ready-to-run containers for cutting-edge models. The cost is complexity: there is a lot to learn, and the stack assumes some comfort with Linux and GPU concepts. Finally, the Kria KV260 uses Vitis AI, the most powerful and the most demanding toolchain here. The pre-built accelerated applications let newcomers start without touching FPGA design, but unlocking the platform’s real potential means engaging with hardware description and the Vitis/Vivado flow — a serious investment that pays off in deterministic, efficient, customizable pipelines.
| Board | Primary framework | Compile step | Language / OS | Community size | Learning curve |
|---|---|---|---|---|---|
| ESP32-S3 | TFLite-Micro / ESP-DL | convert to C array | C/C++ · ESP-IDF/Arduino | Very large | Embedded, moderate |
| Coral | TensorFlow Lite | Edge TPU Compiler | Python · Mendel Linux | Smaller / slowing | Low (if supported) |
| Hailo-8 AI Kit | TF/TFLite/ONNX/PyTorch | Hailo Dataflow Compiler → HEF | Python · Linux host | Growing (Pi ecosystem) | Moderate |
| Raspberry Pi 5 | TF/TFLite/ONNX/PyTorch | Hailo Dataflow Compiler | Python · Raspberry Pi OS | Enormous | Gentle |
| Jetson | PyTorch/TF/ONNX | TensorRT | Python/C++ · JetPack Ubuntu | Large | Moderate–steep |
| Kria KV260 | TF/PyTorch | Vitis AI → xmodel | Python/HDL · PetaLinux | Specialist | Steep |
Read that table as a map of where your time goes. If you want to be productive on day one, favour a gentle curve and a large community — the Raspberry Pi, or the ESP32 if you already speak embedded C. If you are willing to invest for capability, the Jetson and Kria repay the effort with headroom the friendlier boards cannot match. There is no shame in choosing the easier tool; shipping a working project on modest hardware beats struggling with a powerful board you never fully tamed.
The sticker price is only the beginning
When people compare these boards on price, they usually compare the headline number for the board itself — five dollars for an ESP32 module, two hundred and forty-nine for a Jetson. That comparison is honest but incomplete, because the real cost of deploying an AI model includes everything you must buy, power, cool, and maintain around the board over its life. Thinking in terms of total cost of ownership rather than sticker price often changes which board actually makes sense.
Start with the accessories. A bare board rarely boots on its own. You will need a power supply sized correctly for the load, and on several of these platforms that supply is sold separately — the Kria and many Jetson-class kits do not include one, and the Raspberry Pi 5 genuinely wants a higher-wattage USB-C source than the chargers most people have lying around. You will need reliable storage; cheap microSD cards are a false economy that corrupt under the constant writes of a running system, so budget for a quality card or, better on the Pi and Jetson, an NVMe SSD. If your project involves vision you need a compatible camera, and camera interfaces differ across boards, so the module you already own may not fit. Add cooling for the higher-powered boards, and possibly an enclosure, and the modest accelerator that looked cheap can quietly double in delivered cost.
Then consider the running costs. Power draw is not just a battery-life question; over months of continuous operation it becomes an electricity bill and a thermal-design problem. A board that draws twenty watts around the clock consumes meaningfully more energy than one that draws two, and it may require ventilation or fans that add noise and failure points. For a single desktop prototype this is negligible; for a fleet of hundreds of always-on devices it dominates the economics, which is precisely why the low-power ESP32 and Coral are so attractive at scale even though their headline capability is modest.
Finally, weigh the human cost. The hours you spend learning a toolchain, debugging a compilation failure, or working around an unsupported operation are real costs even though no invoice captures them. A board with a steep learning curve and a small community can consume weeks that a friendlier platform would have saved — time that is usually far more expensive than the hardware. This is the hidden reason the Raspberry Pi remains so popular: not because its silicon is the best, but because its total cost of ownership, including your time, is often the lowest for anything short of a specialised production deployment.
Plain-language glossary
If any term in this guide sent you searching, here are the essentials in one place.
- INFERENCE Running a trained model to make a prediction on new data — the job all six boards do.
- TRAINING Teaching a model from data. Compute-heavy; done on workstations or in the cloud, not on these boards.
- TOPS Tera-Operations Per Second — a peak measure of an accelerator’s math throughput. A ceiling, not a guarantee.
- QUANTIZATION Converting a model from 32-bit floats to lower precision such as 8-bit integers, to shrink it and speed it up.
- INT8 / FP16 / FP32 Numeric precisions. FP32 is used in training; INT8 is the fast, compact format most edge accelerators want; FP16 is a middle ground the Jetson supports.
- LATENCY The time a single inference takes. Lower is better; for control loops it must also be predictable.
- THROUGHPUT How many inferences per second you can sustain — often expressed as frames per second for vision.
- NPU Neural Processing Unit — a chip dedicated to running neural networks efficiently (e.g. the Hailo on the Pi HAT).
- ASIC Application-Specific Integrated Circuit — fixed-function silicon built for one job, like the Coral Edge TPU.
- FPGA Field-Programmable Gate Array — reconfigurable logic you can shape into a custom datapath, as on the Kria.
- DPU Deep-learning Processing Unit — the configurable inference engine instantiated in the Kria’s FPGA fabric.
- SoC / SOM System-on-Chip / System-on-Module — an integrated processor, and a small board carrying that processor plus memory for slotting into a product.
- MCU / SBC Microcontroller (tiny, no OS, like the ESP32) / Single-Board Computer (runs Linux, like the Pi and Coral).
- ONNX / TFLite Portable model file formats you export to after training, before compiling for a specific board.
- TinyML The practice of running very small machine-learning models on microcontrollers under tight power and memory limits.
Match the board to the model, not the hype
The question “which board should I use to deploy an AI model?” only feels hard because it is really five questions wearing one coat. Once you separate them — how big is the model, how fast must it run, how much power can I spend, how predictable must the timing be, how far will this go toward production — the answer usually reveals itself.
Reach for the ESP32-S3 when the model is tiny and the device lives on a battery. Reach for the Coral Dev Board when a fixed vision model must run at maximum efficiency. Reach for the Hailo-8 AI Kit when you need high-throughput or multi-stream vision per watt and can add an NPU to a host you already run. Reach for the Raspberry Pi 5 when you want a flexible, friendly, full Linux computer that scales its AI with a HAT — the right default for most people most of the time. Reach for the Jetson Orin Nano when you need transformers, vision-language models, small LLMs, or robotics with the richest software stack in edge AI. And reach for the Kria KV260 when deterministic latency, many cameras, and a real production path matter more than convenience.
There is no trophy for buying the most powerful board — only for shipping something that works, sized correctly, running cool and cheap and reliably where it needs to. Find your spot on the spectrum, follow the pipeline, avoid the pitfalls, and deploy with confidence.
Locate your model on the compute spectrum — tiny-and-battery, efficient-fixed-vision, high-throughput-vision-per-watt, flexible-generalist, generative-AI, or deterministic-multi-camera — and pick the board that sits closest to it.